The world of fishing, while incredibly rewarding, can sometimes seem daunting to newcomers. One of the most fundamental steps in preparing for a successful day on the water is learning how to rig a fishing line correctly. Whether you’re aiming for fish lurking near the bottom or those feeding closer to the surface, understanding the basic setup is key. The accompanying video offers a fantastic visual guide to these essential techniques, but for those who prefer to read, or simply want to dive deeper into the nuances, this comprehensive guide will expand on the crucial steps of rigging your line, ensuring you’re ready to cast with confidence.
Understanding the Basics: Bottom Fishing vs. Float Fishing
Before you even begin to rig a fishing line, it’s helpful to consider where you expect the fish to be. The two primary approaches for beginners involve targeting fish near the bottom or those suspended closer to the surface. Each method requires a slightly different setup, though they share common components.
-
Bottom Fishing Setup
This method is ideal for species that feed on the seabed or in deeper water. The goal is to get your bait down and keep it there. Your rig will typically consist of your main line, a weight (sinker), and a hook. The weight ensures your bait reaches the desired depth and stays put, even in currents. The video touches on using a longer sinker line with a shorter hook line, particularly for situations like beach casting. This design helps prevent your hook from snagging on rocks or weeds at the bottom while allowing the bait to drift enticingly nearby. The weight anchors your setup, and your bait, attached to a shorter leader, can move more naturally in the water, appearing less suspicious to cautious fish.
-
Float Fishing Setup (Bobber Fishing)
Conversely, float fishing, often called bobber fishing, is excellent for presenting bait at a specific depth off the bottom or just below the surface. This technique involves a float (or bobber) on your main line, a small weight if needed to cock the float, and your hook. The float serves two main purposes: it suspends your bait at a predetermined depth, and it acts as a visual indicator when a fish takes the bait. When that float dips or moves, you know it’s time to set the hook! The video specifically highlights the bubble float as an excellent choice for beginners due to its simplicity and adjustability.
The All-Purpose Knot: Mastering the Clinch Knot
One of the most valuable pieces of advice for any beginner angler is to master one reliable knot rather than getting overwhelmed by dozens. The video’s instructor, Gavin Hodgson, wisely recommends the clinch knot (also known as the half blood knot) as the go-to for securing your main line to a swivel, your weight, or your hook. This knot is renowned for its strength and ease of tying, making it a perfect choice for almost all your terminal tackle connections.
Here’s a breakdown of how to tie a strong clinch knot:
- Pass Through: Thread the tag end of your fishing line through the eye of the hook, swivel, or weight. Ensure you have enough tag end to work with, typically about 6-8 inches.
- Twist: Take the tag end and wrap it around the standing (main) line. Aim for four or five turns for most monofilament and fluorocarbon lines. For thinner lines, more turns might be beneficial, while heavier lines might require fewer. The key is consistency in the number of wraps.
- Initial Loop: Pass the tag end back through the first loop you created right next to the eye of the hook. This creates a small, secondary loop.
- The “Tuck” (Crucial Step): Now, and this is the vital part many people overlook, pass the tag end through the larger loop that was formed when you made your wraps. This extra tuck is incredibly important, especially with finer lines, as it prevents the knot from slipping under pressure. Without this tuck, even a well-tied knot can loosen over time or with a strong fish.
- Wet the Knot: Before tightening, always wet the knot with a little saliva or water. This acts as a lubricant, allowing the nylon or fluorocarbon to slide smoothly into place without creating friction. Friction generates heat, and excessive heat can weaken or make the line brittle, compromising the knot’s integrity. Wetting the knot ensures a stronger, more reliable connection.
- Tighten and Trim: Slowly pull both the standing line and the tag end, allowing the wraps to cinch down neatly into a compact barrel shape. Once tight, give it a firm tug to ensure it’s secure. Finally, trim the excess tag end, leaving a small stub (about 1/8 to 1/4 inch) to prevent the knot from unraveling. While mono is easy to cut, braid can be trickier, often requiring sharp scissors or clippers.
By using the same strong and reliable knot for all your connections, you simplify the rigging process and build confidence in your setup. This consistency is a hallmark of successful beginner anglers.
Rigging for Action: Practical Setups
With your knot knowledge secure, let’s explore how to assemble these components into functional rigs. The video provides excellent insights into two common beginner setups.
The Basic Bottom Rig
For fishing the bottom, a simple weight-to-main-line connection, followed by a hook leader, is often all you need. Consider these points:
- Weight Selection: Choose a weight appropriate for your fishing conditions. In calm lakes, a lighter sinker might suffice. In rivers or strong currents, a heavier, perhaps pyramid-shaped, sinker will help your bait stay put.
- Leader Length: As mentioned in the video, using a shorter leader (the line from your weight to your hook) for bottom fishing, especially in rocky or weedy areas, can significantly reduce snags. While the main weight settles, your bait can drift just above the bottom, enticing fish without getting caught up. A leader length of 12-24 inches is a good starting point for many situations.
- Hook Size: Match your hook size to your bait and target fish. A smaller hook for smaller bait and panfish, a larger hook for larger bait and game fish.
The Versatile Bubble Float Rig
For surface or suspended fishing, the bubble float is an excellent choice for beginners, as Gavin demonstrates. Here’s why it’s so practical and how to use it:
- Simplicity: Bubble floats are typically clear, hollow plastic spheres with stoppers at either end. They require minimal fuss.
- Adjustable Weight: The genius of the bubble float lies in its ability to be partially filled with water. As the video shows, undoing both stoppers, submerging it until it’s about half full, and then replacing the stoppers instantly gives you a casting weight and a visible float. This added weight helps you cast further and more accurately, even with lightweight baits.
- Visual Strike Indicator: Once your rig is cast, the float sits on the surface. When a fish bites your bait below, the float will dip, twitch, or move horizontally, signaling a strike.
-
Setup:
- Tie one end of the bubble float to your main line using the reliable clinch knot.
- Fill the float with water to your desired level (half full is a great starting point for good casting weight and buoyancy).
- Tie your hook line to the other end of the float. This creates a simple, effective system where the float is between your main line and your hook.
- Depth Control: The length of line between your bubble float and your hook determines how deep your bait will suspend. Experiment with different depths until you find where the fish are biting.
Beyond the Knot: Additional Rigging Tips for Beginners
While the video focuses on the fundamental rigging process, a few additional tips can enhance your fishing experience:
- Test Your Knots: Before casting, always give your knots a gentle but firm tug to ensure they are properly seated and secure. It’s better to find a weak knot on land than to lose a fish (and your tackle) because of it.
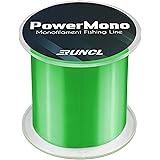
- Line Choice: For beginners, monofilament line is often recommended due to its stretch, abrasion resistance, and ease of handling. As you gain experience, you might explore fluorocarbon or braided lines, which have different characteristics.
- Swivels and Snaps: While not covered in the video’s basic setup, incorporating a small swivel between your main line and leader can prevent line twist, especially when using spinning lures or if your bait tends to rotate. A snap swivel can also make changing lures or weights quicker and easier. For these basic bait and float rigs, however, they are often not necessary and keeping it simple is best.
- Respect the Environment: Always cut and discard excess line responsibly. Fishing line can be a hazard to wildlife if left in the environment.
Learning how to rig a fishing line is a foundational skill that every angler must master. By understanding the differences between bottom and float fishing, practicing the clinch knot until it’s second nature, and implementing simple, effective setups like the bubble float, you’ll be well on your way to enjoying the tranquility and excitement that fishing offers. Remember, simplicity often leads to success in your early angling adventures. Practice these techniques, and you’ll soon be confidently rigging a fishing line for a variety of conditions.
Casting Your Questions: Rigging Q&A
What does “rigging a fishing line” mean?
Rigging a fishing line means setting up your fishing line with the necessary components like weights, floats, and hooks, to prepare for catching fish. It’s a fundamental step for a successful day on the water.
What are the two main types of fishing setups for beginners?
For beginners, the two primary approaches are bottom fishing and float fishing. Bottom fishing targets fish deeper on the seabed, while float fishing aims for fish at specific depths or near the surface.
What is the “Clinch Knot” and why should I learn it?
The Clinch Knot is a strong and easy-to-tie knot recommended for beginners to connect their main line to hooks, swivels, or weights. Mastering this one reliable knot simplifies the rigging process significantly.
What is a “bubble float” and how does it help with fishing?
A bubble float is a simple, hollow plastic sphere that you can fill partially with water to add casting weight and act as a visual indicator. It helps you cast further and shows you when a fish bites your bait.